
What you’ll need
- Roster templates already set up on each client’s profile (see Rapid rostering)
- Only clients with roster templates appear in the wizard
Using the roster template wizard
1
Open the wizard
Go to Operations → Roster Template Wizard.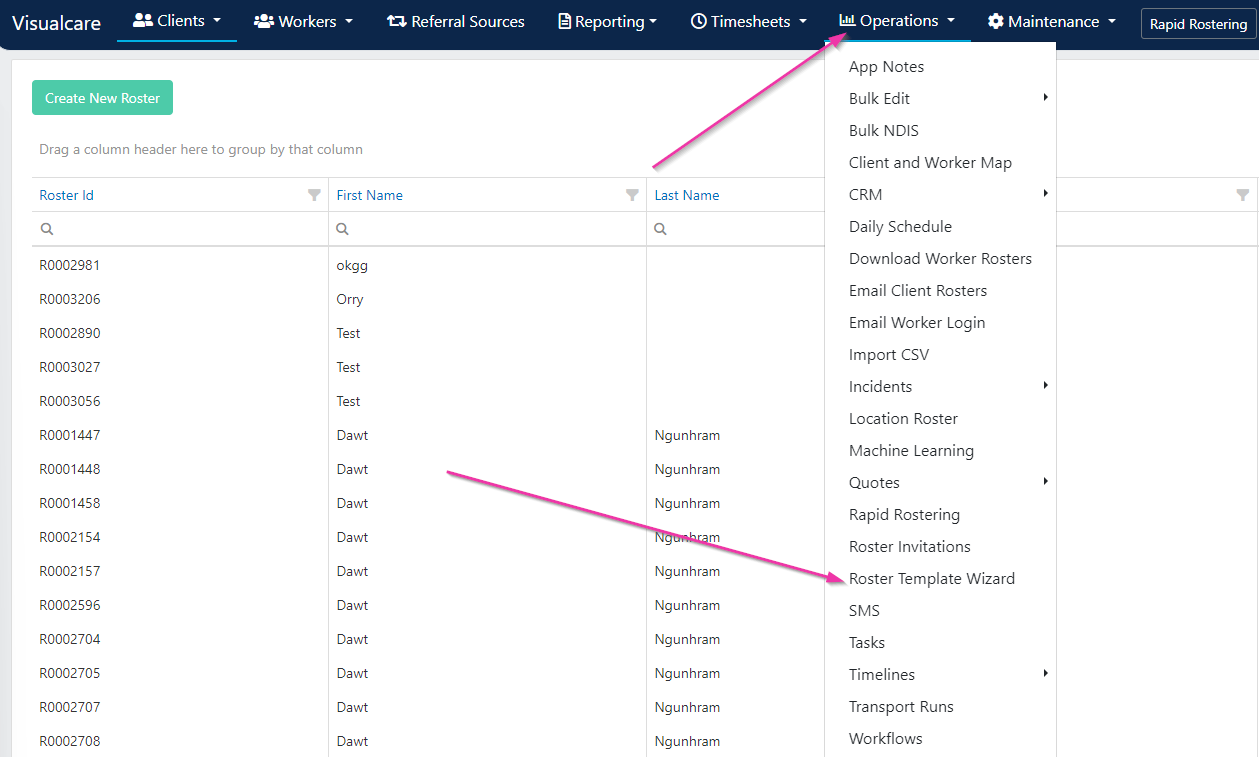
2
Select clients
Select the clients from the list using the tick boxes, then click Start Wizard.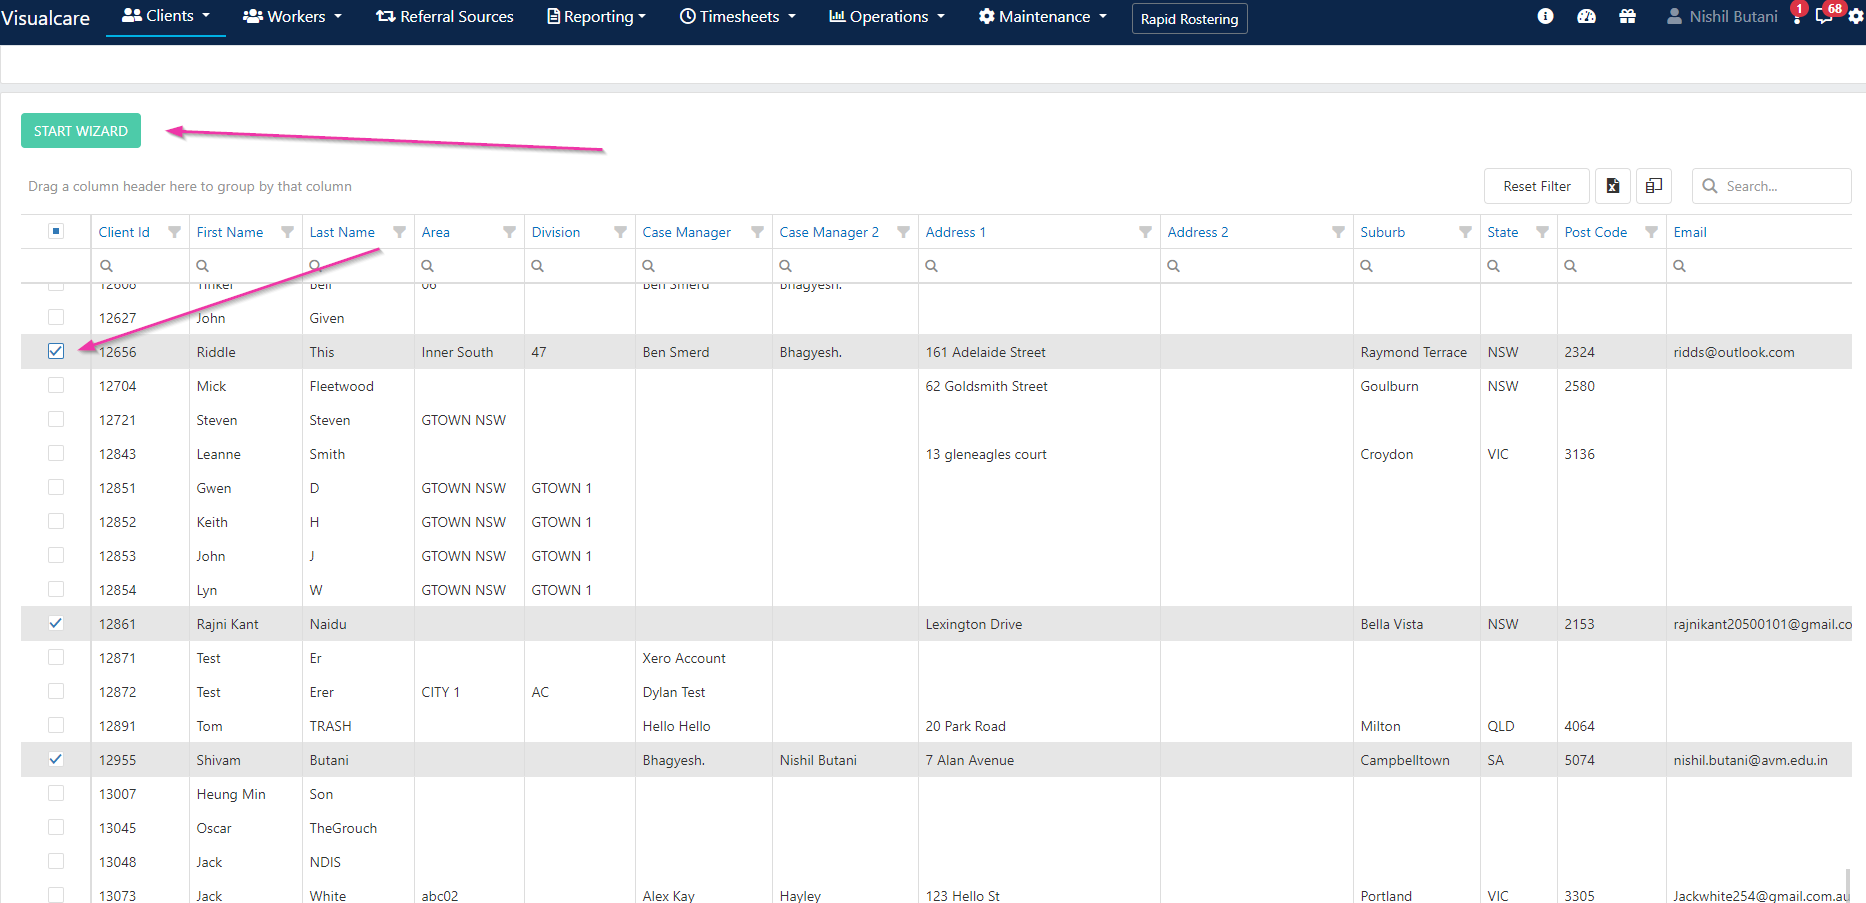
Only clients with roster templates already added to their profile appear in this list.
3
Set the date range
Enter the start and end dates for the rosters to be created. Untick any shifts you want to exclude, then click Next.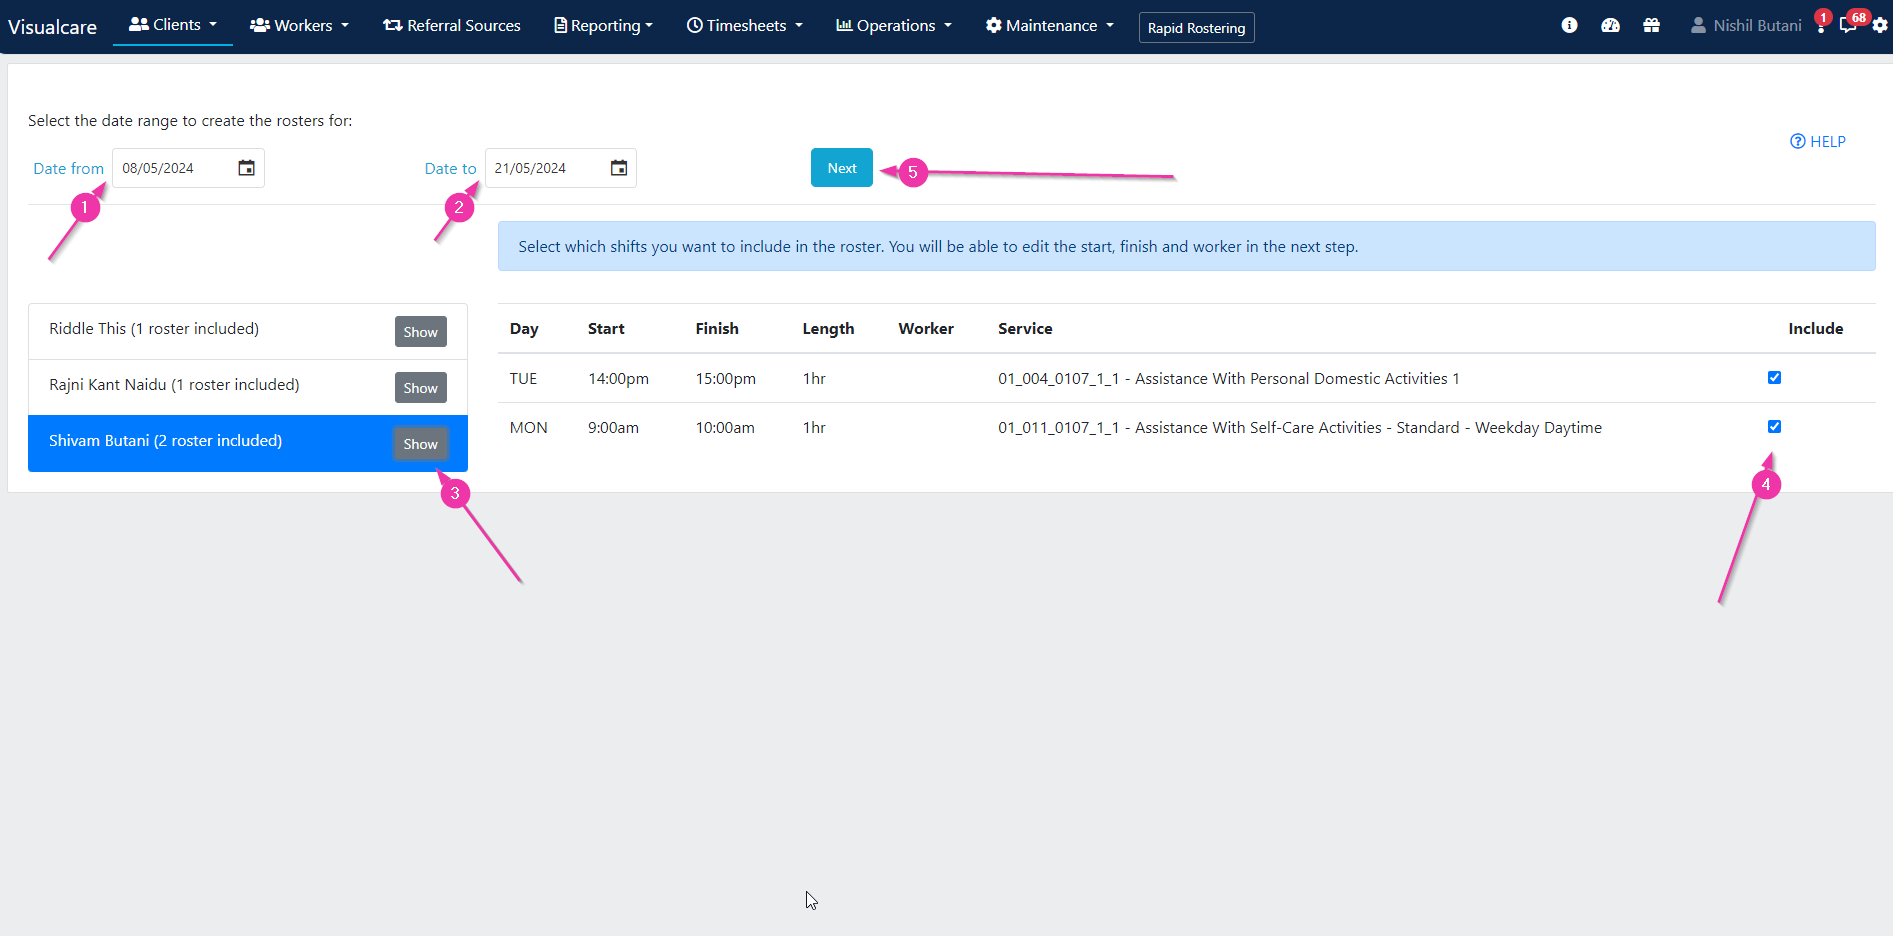
4
Review and assign workers
A worker can be assigned to any shift that doesn’t already have one selected. Confirm all details and click Next.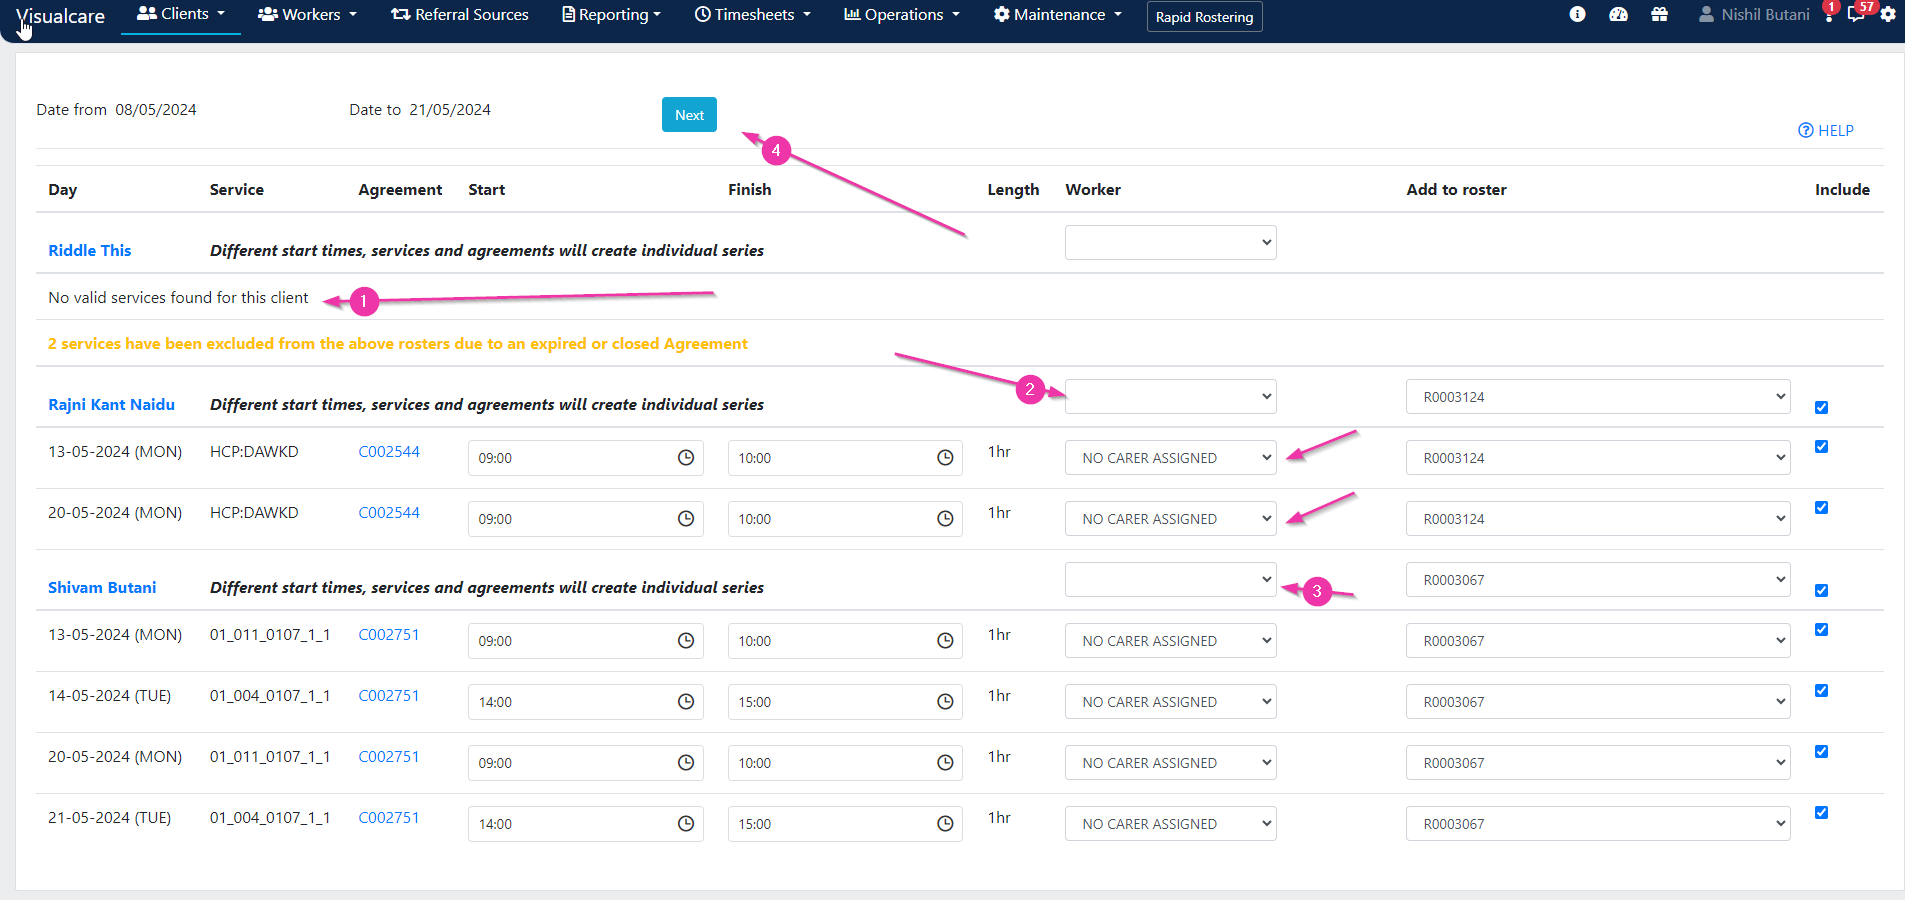
5
Process rosters
A dialogue box displays the number of shifts to be created. Click Process Rosters to create the shifts, which then appear on each client’s roster.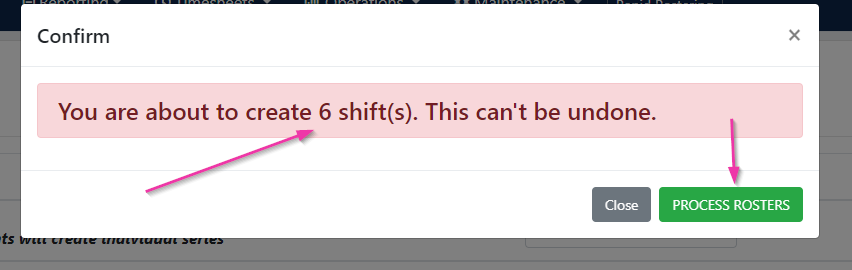
Running into issues?
See Scheduling troubleshooting for common errors and fixes.Related articles
Rapid rostering
Create and manage roster templates for individual clients
Creating new shifts
Create shifts manually in a client roster
Timeline views
View and manage rosters across workers and clients