
This is separate from the KeyPay integration used for timesheet and kilometre exports.
What you’ll need
- An active Employment Hero account with admin access
- Workers already created in both Visualcare and Employment Hero
- Admin access to Visualcare
What syncs once connected
Compliance and leave
- Compliance (certificates): Active and Approved certificates in Employment Hero sync to worker compliance items in Visualcare daily
- Leave: leave sync is not enabled by default. If you need leave from Employment Hero to flow into Visualcare, let your Implementation Consultant know and the team enables it for you
Worker data
The following fields sync from Employment Hero to Visualcare daily:Visualcare matches workers by comparing the Company Email in Employment Hero with the Email on the worker profile in Visualcare. Make sure these match for each worker you want to sync. Case Manager only syncs if the Primary Manager’s email in Employment Hero matches a user’s username in Visualcare.
Part 1: Create an application in Employment Hero
Create an API application in Employment Hero’s Developer Portal so Visualcare can read your worker and compliance data.1
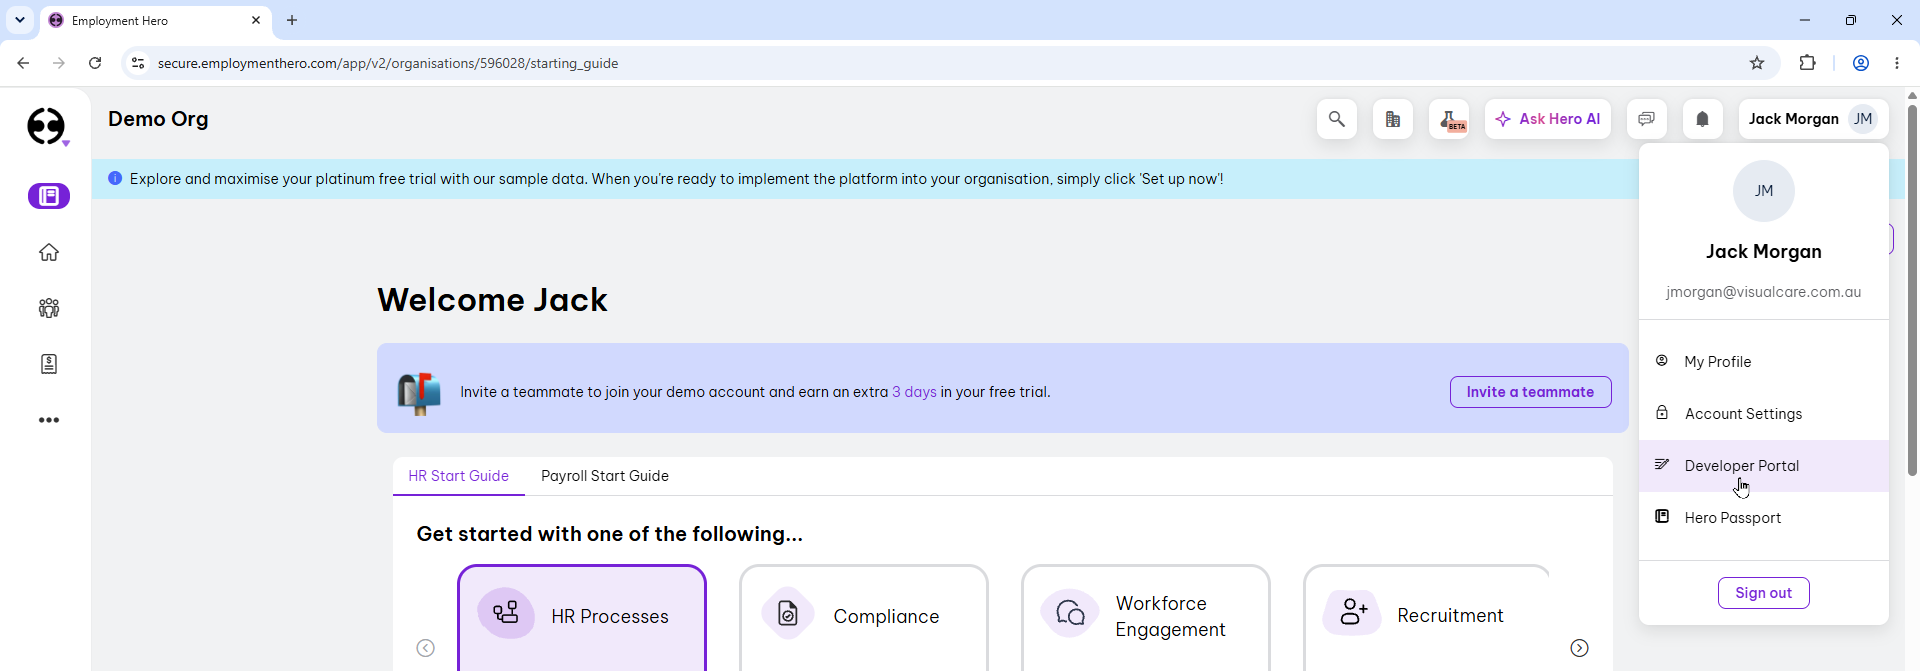
Open the Developer Portal
- Log into Employment Hero
- Click your profile icon in the top-right corner
-
Select Developer Portal from the dropdown menu
2
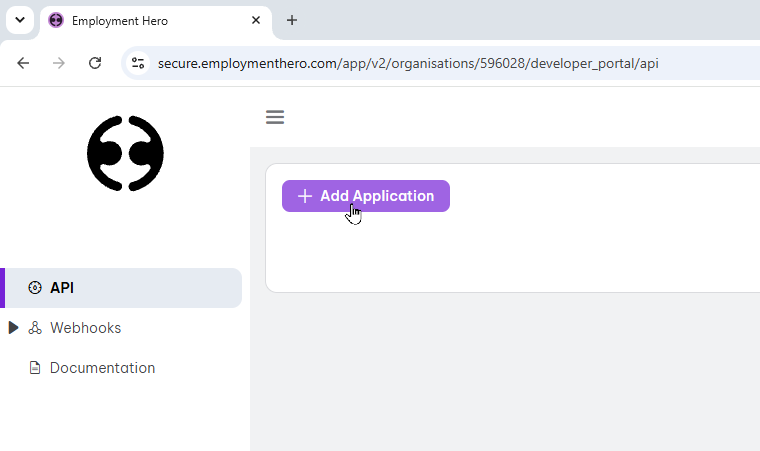
Add a new application
-
On the API page, click + Add Application
- Fill in the application details:
- Application Name: Visualcare (or any name of your choice)
-
Redirect URI:
https://app.visualcare.com.au/inc/export/employmenthero/index.php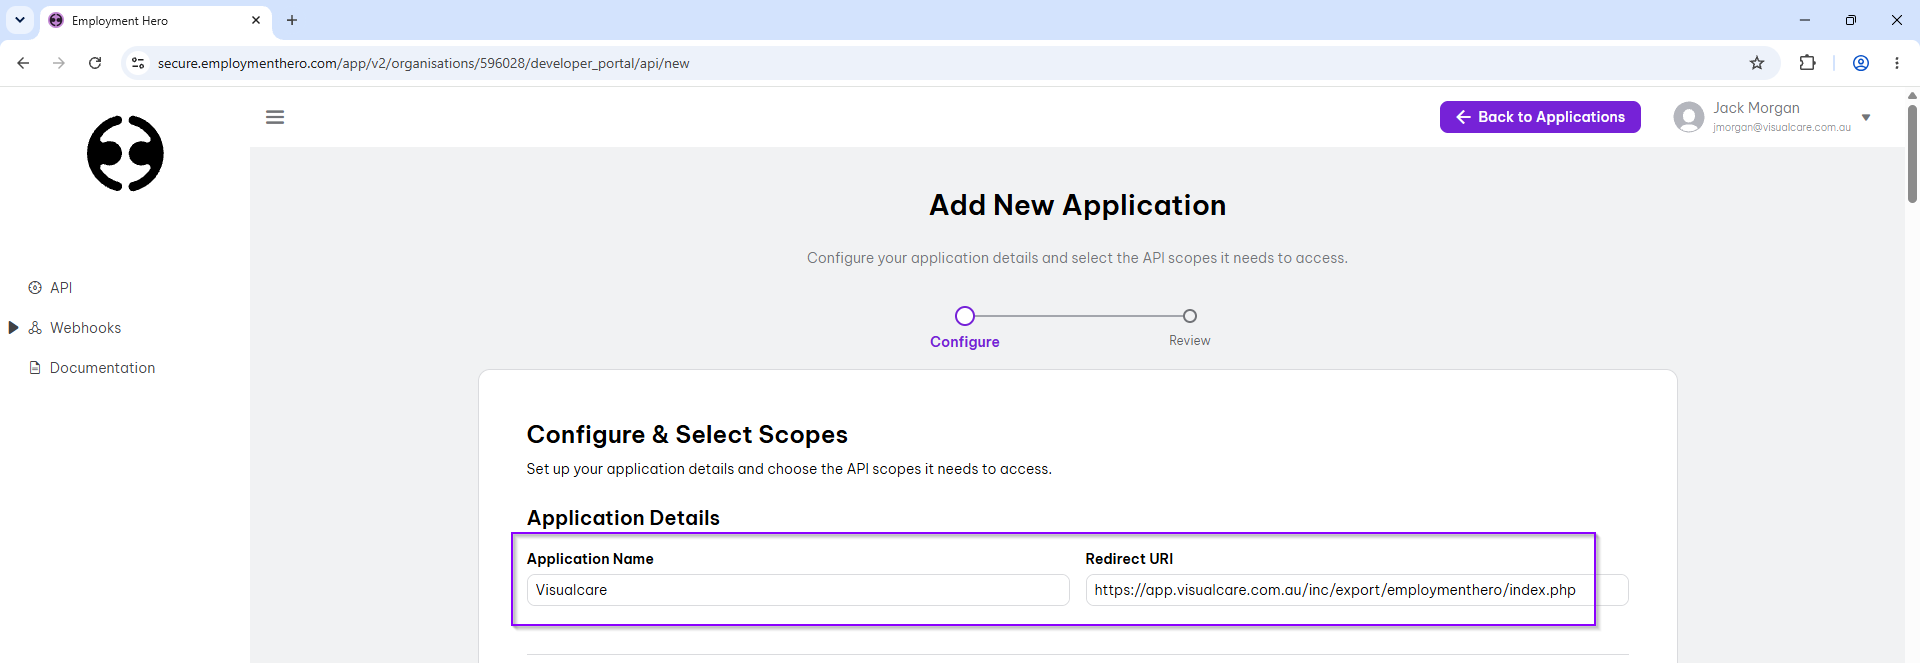
3
Select the required scopes
Scroll down to the scope selection area. You need to enable Read access for each of the following: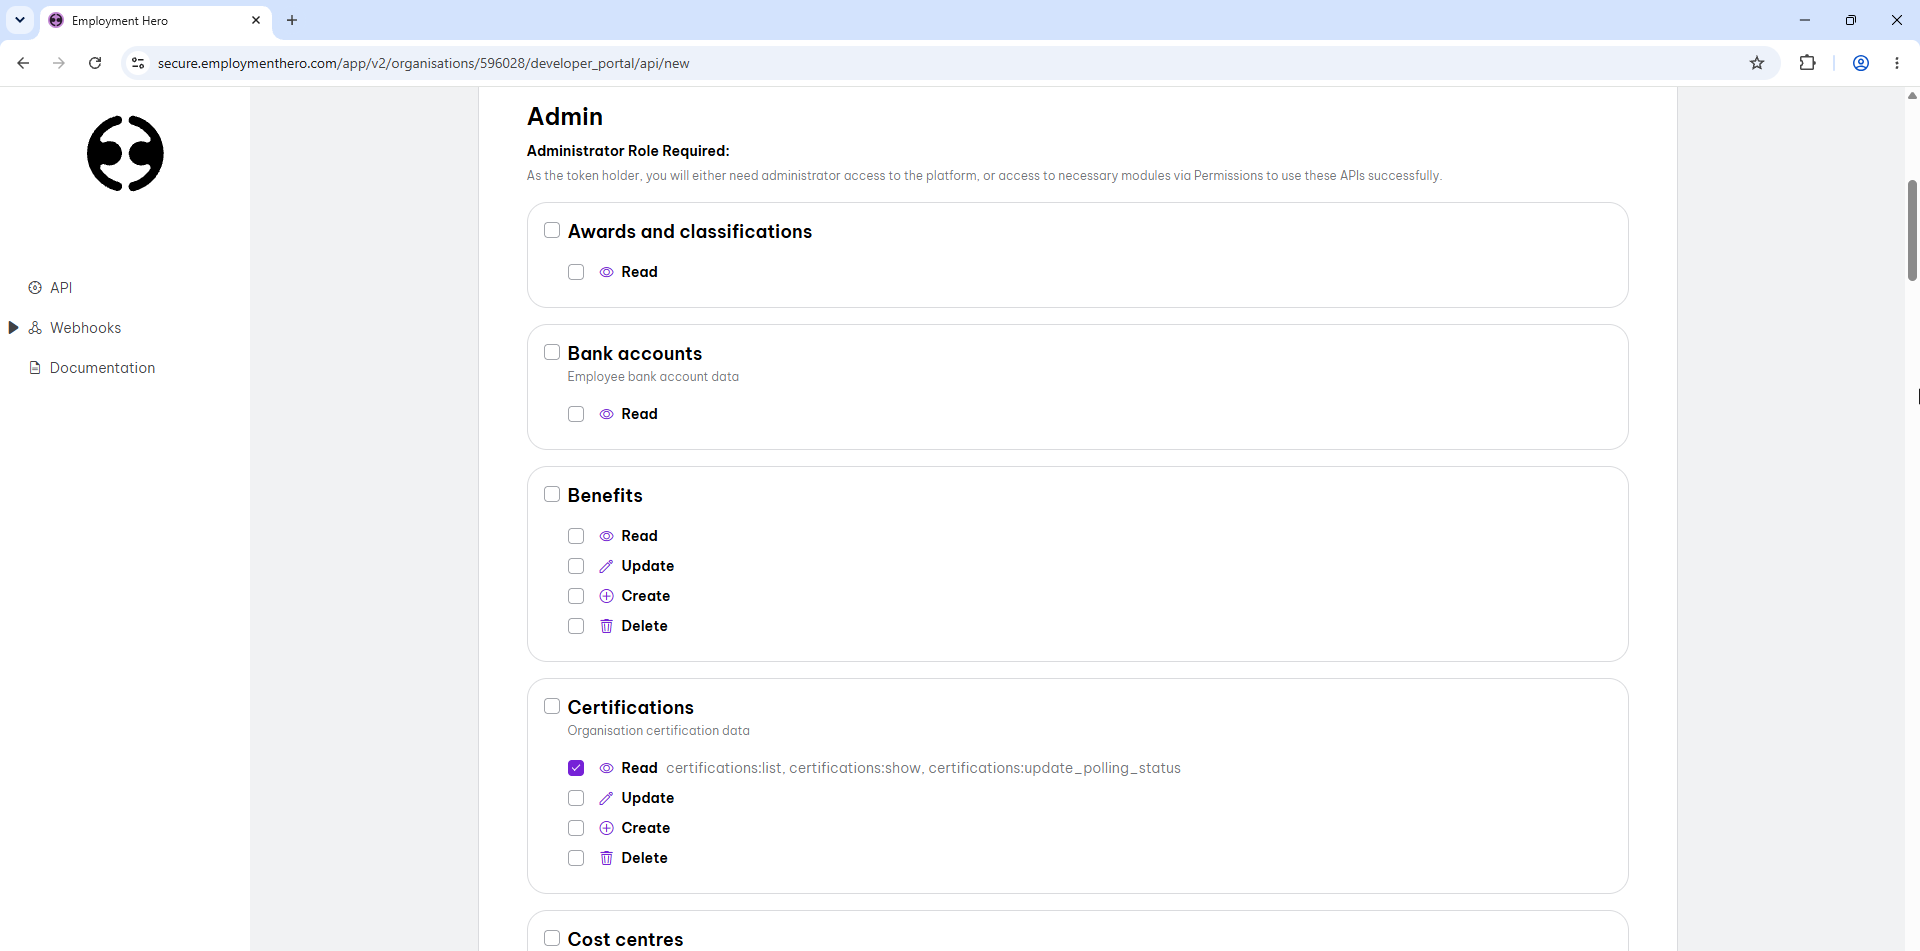
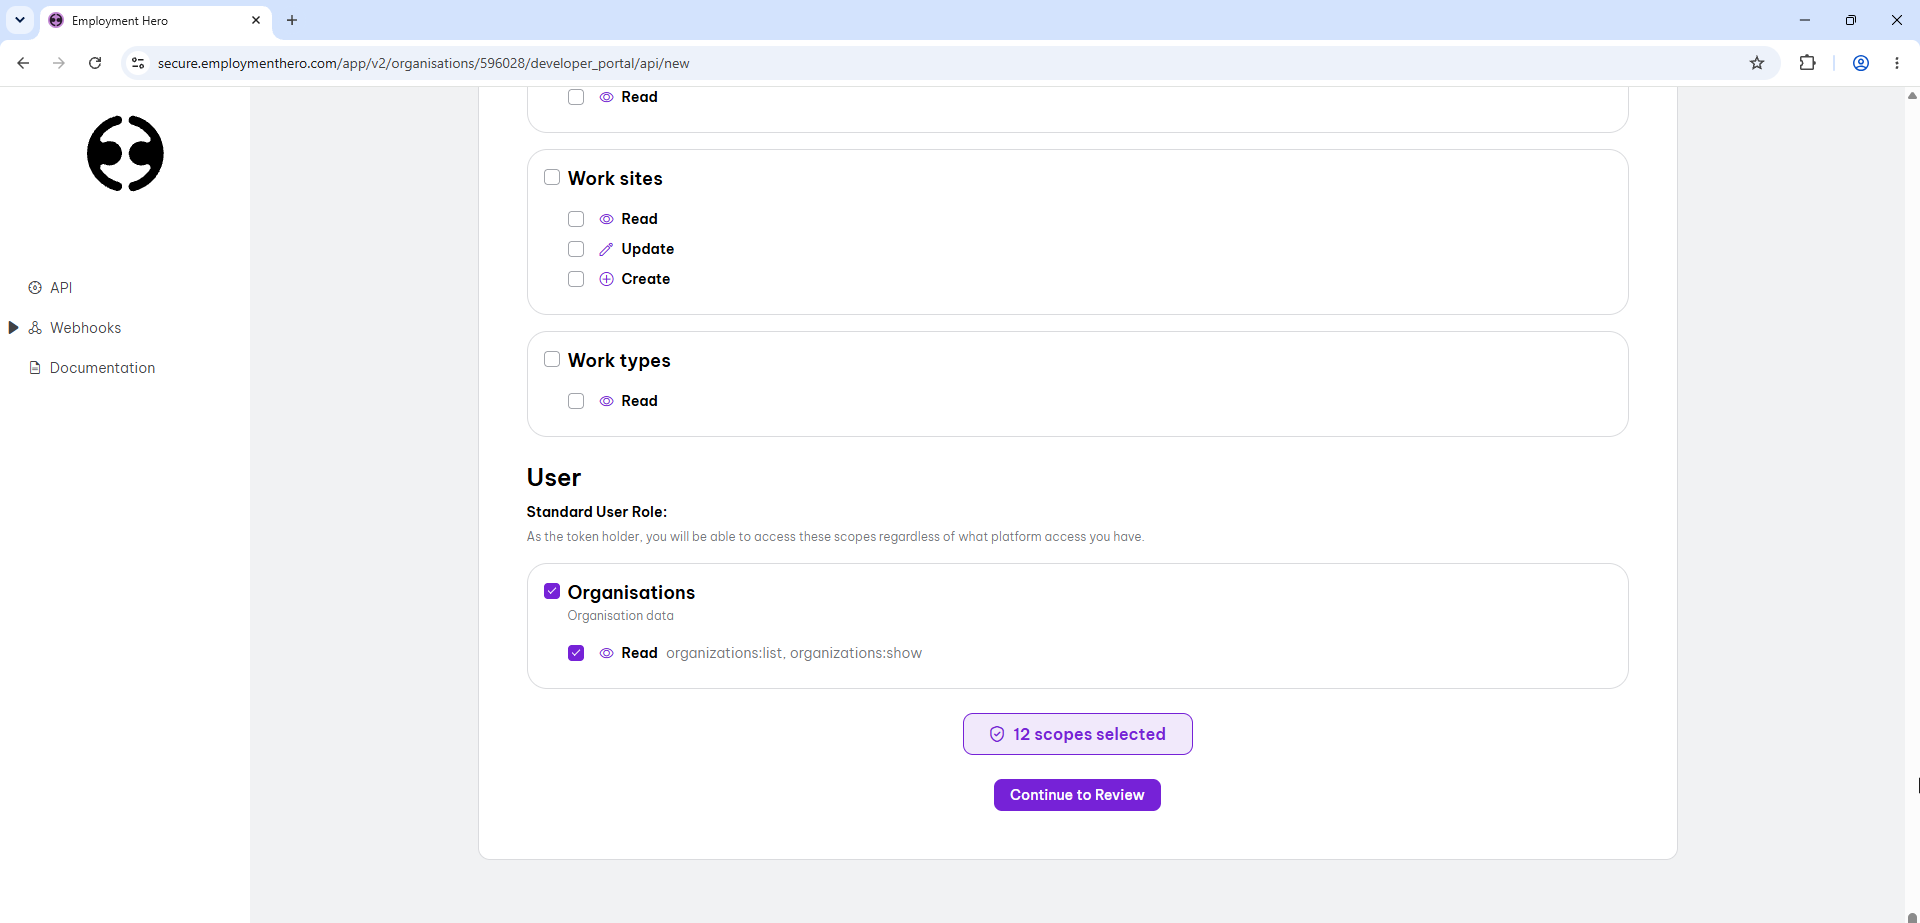
- Certifications (Read)
- Employees (Read)
- Employees certifications (Read)
- Leave requests (Read)
- Organisations (Read, under the User section)
4
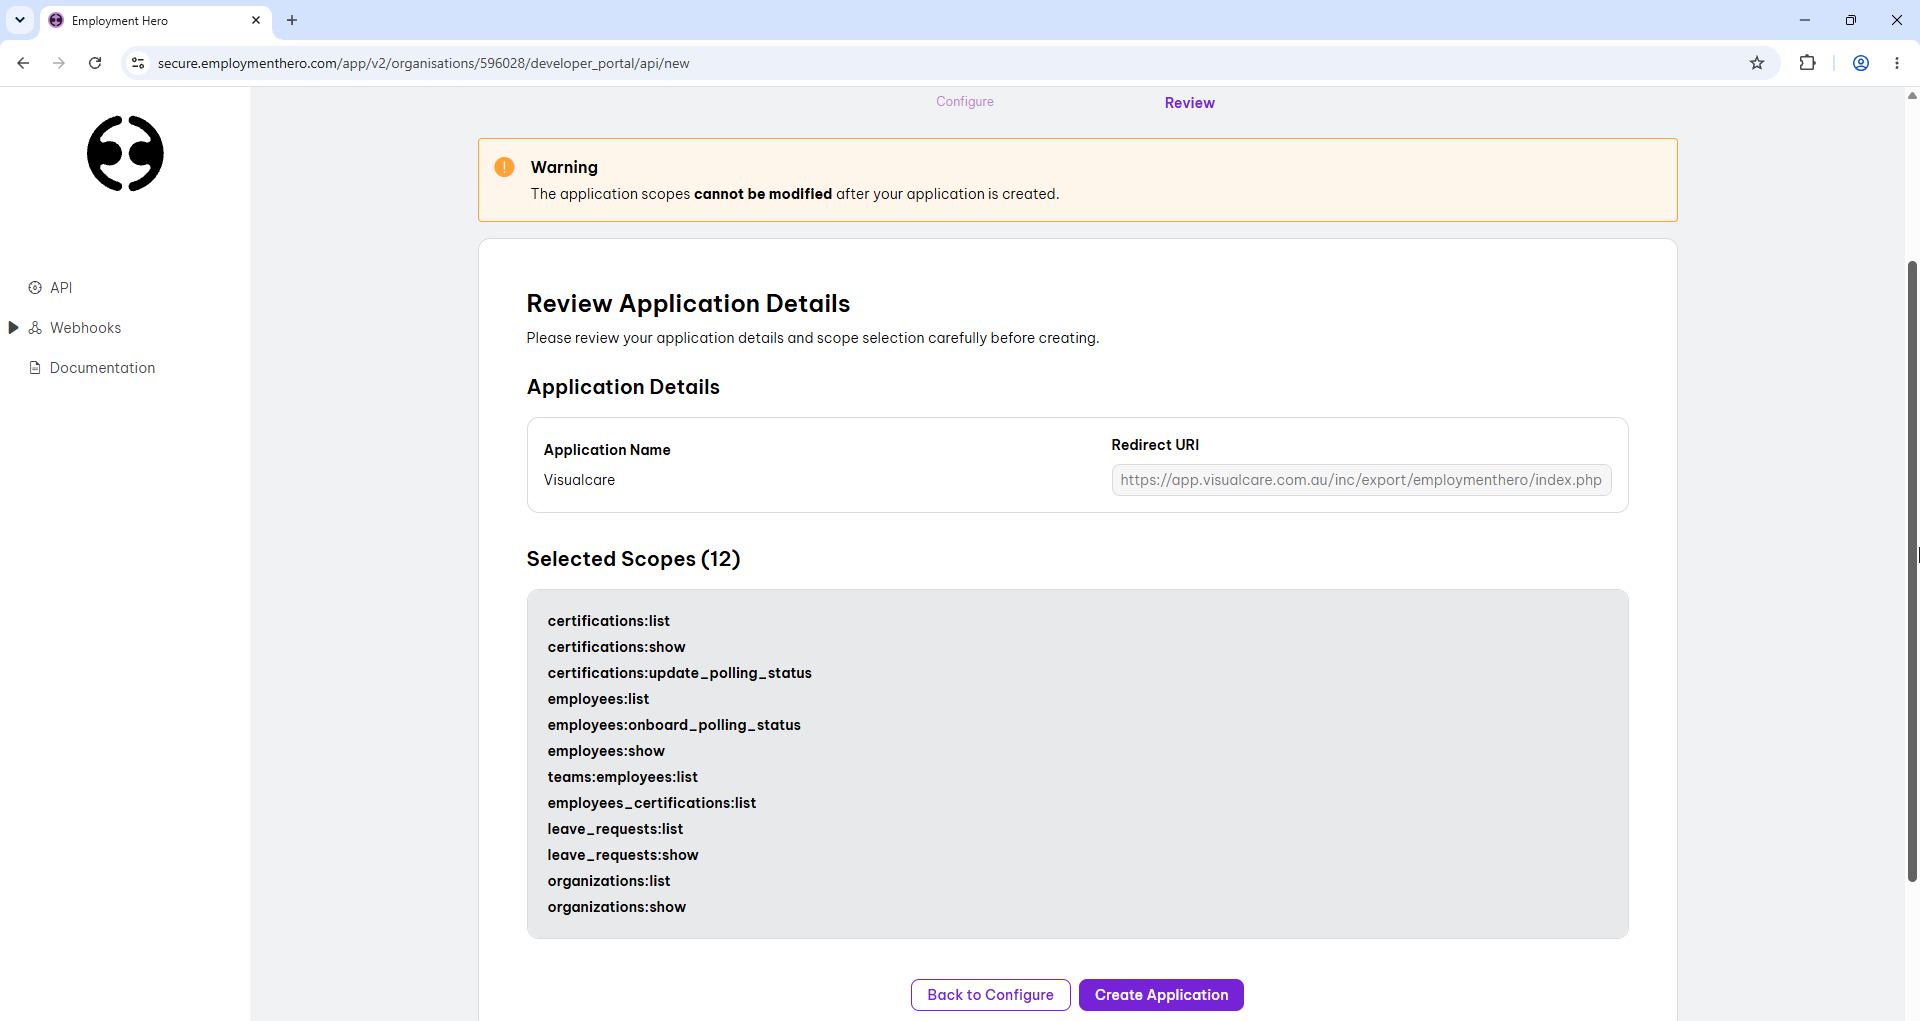
Review and create the application
- Click Continue to Review
- Confirm the application name, redirect URI, and all 12 scopes look correct
- Click Create Application
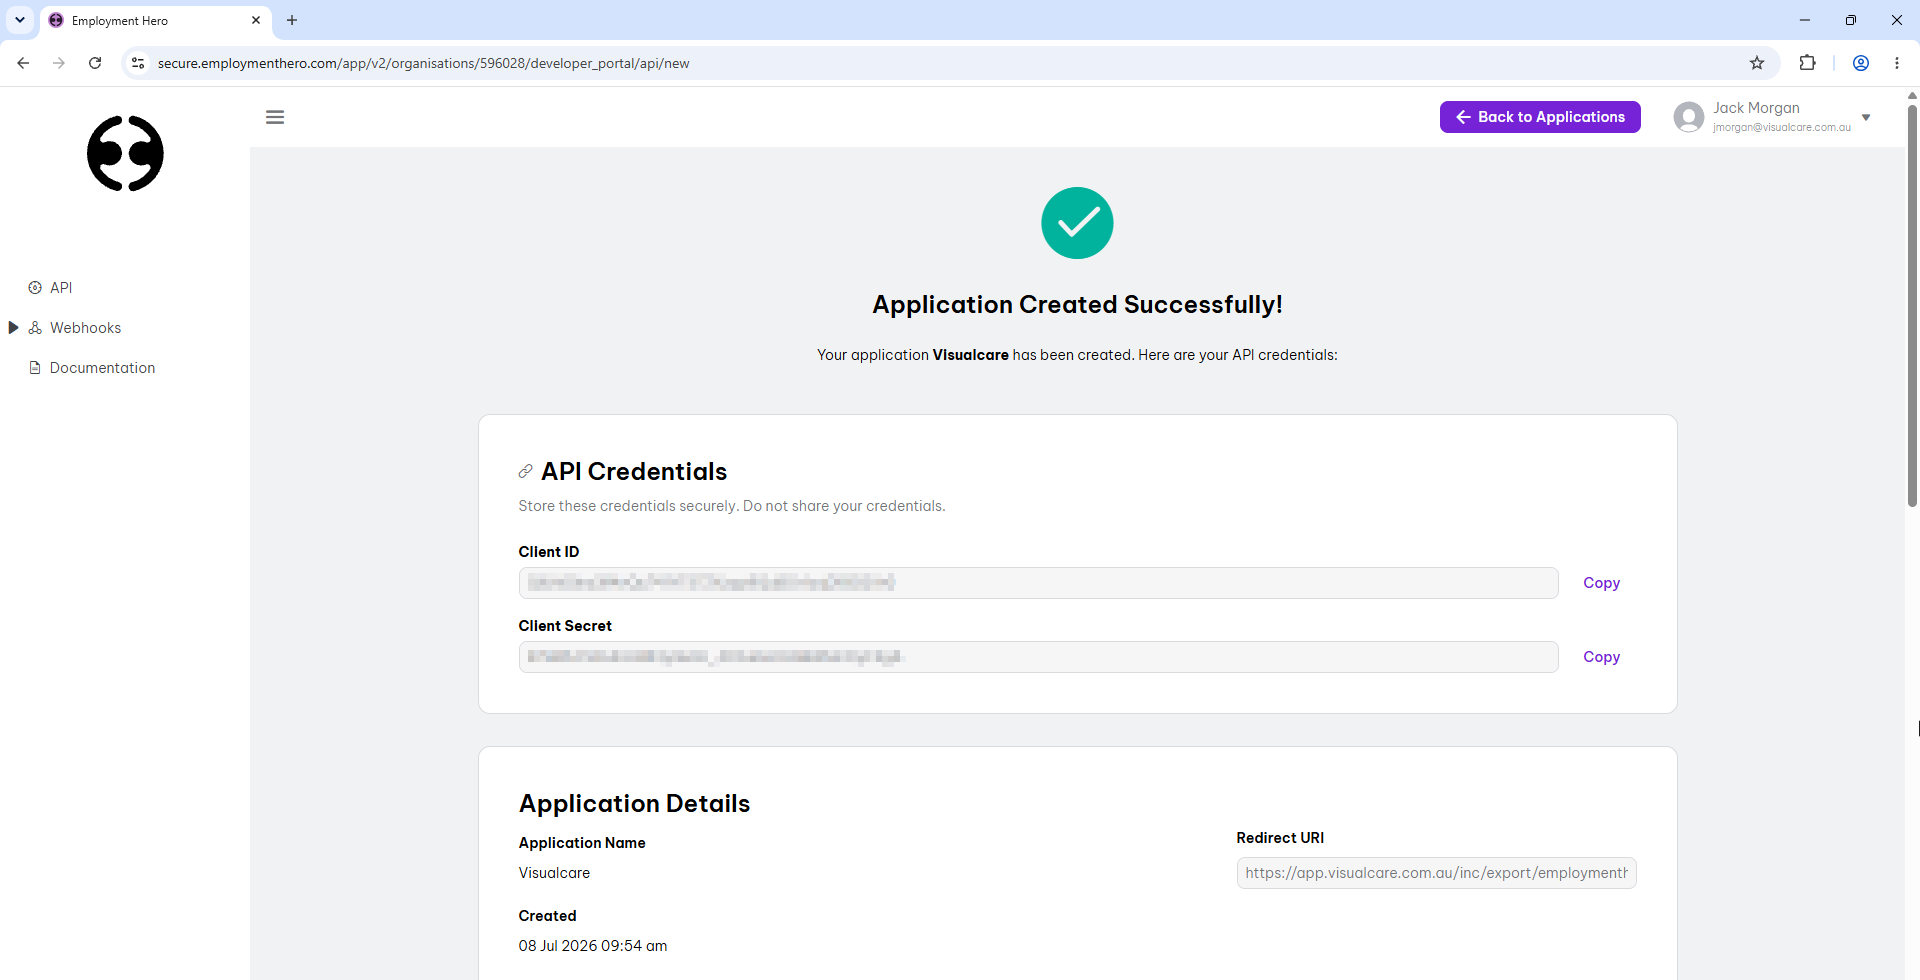
- You are shown a Client ID and Client Secret. Copy both immediately.
Part 2: Authorise the connection
Send your credentials to the Visualcare team and complete the authorisation to generate your access tokens.1
Send your credentials to the Visualcare team
Send the Client ID and Client Secret to your Visualcare Implementation Consultant. We recommend sending these securely, for example:
- A password-protected document with the password sent separately
- A one-time secret sharing service
2
Generate the access tokens
Once the Visualcare team confirms your Client ID and Secret have been entered, complete the following while logged into Visualcare:
-
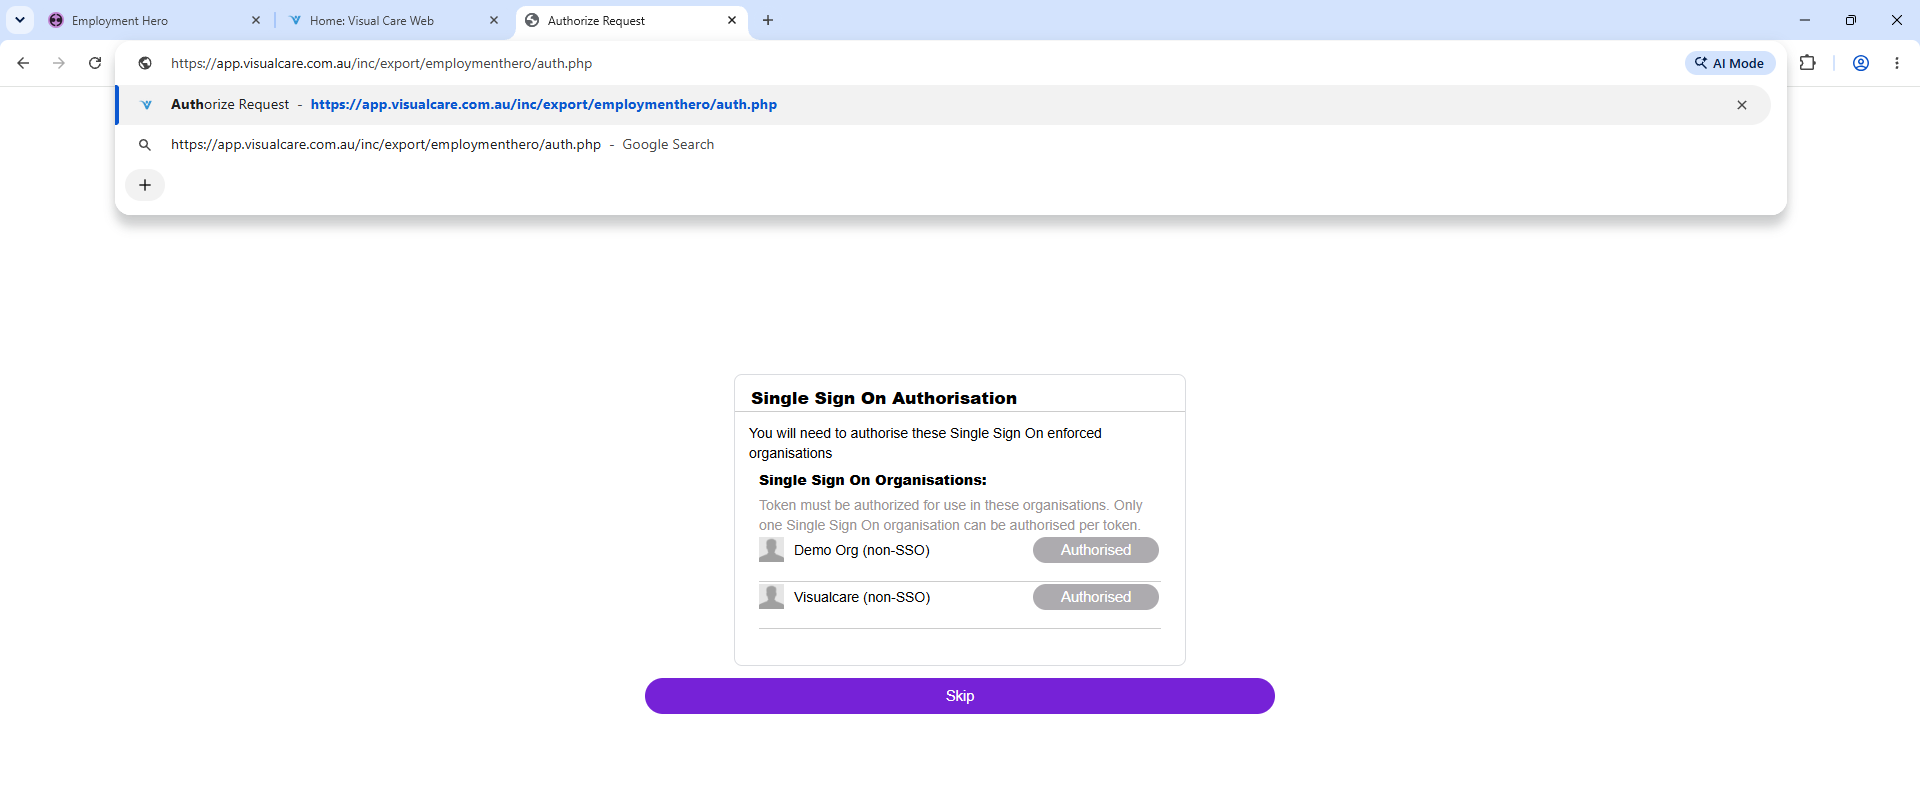
Open a new browser tab and navigate to:
https://app.visualcare.com.au/inc/export/employmenthero/auth.php -
If prompted with a Single Sign On Authorisation screen, click Authorised next to your organisation
-
On the Authorize with EmploymentHero screen, review the permissions and click Allow
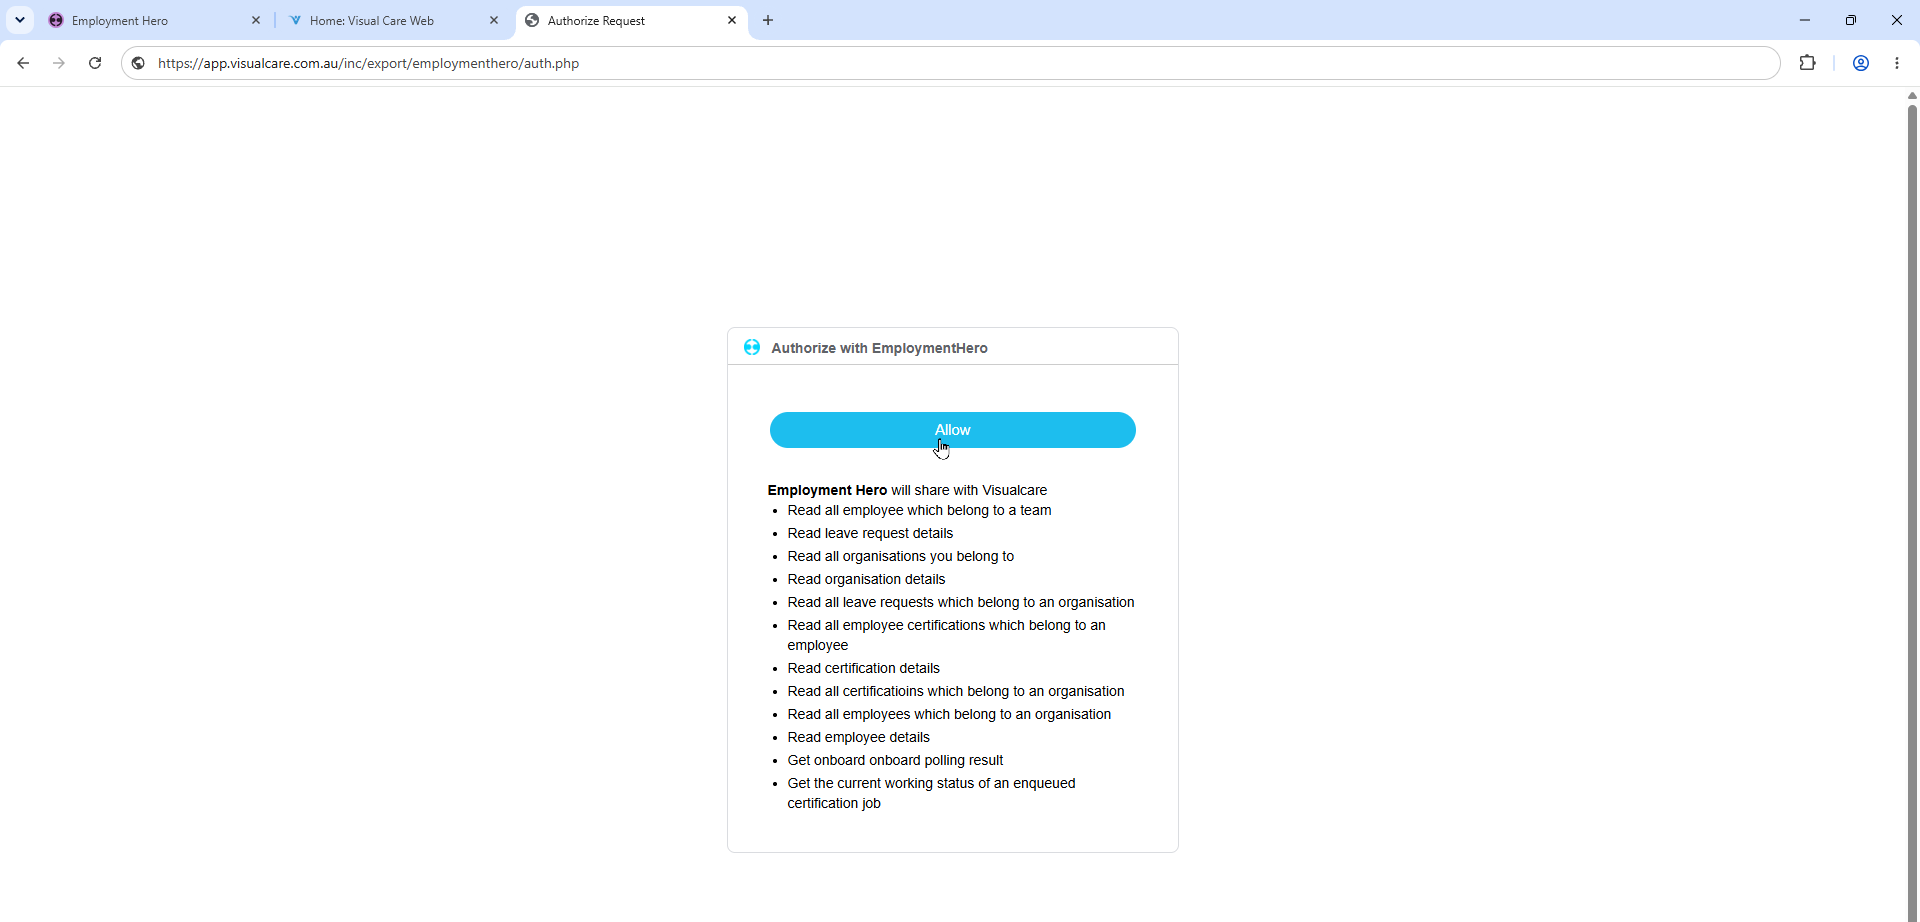
- The page displays three values: Access Token, Refresh Token, and Code
-
Copy all three values and send them to the Visualcare team using the same secure method as the previous step
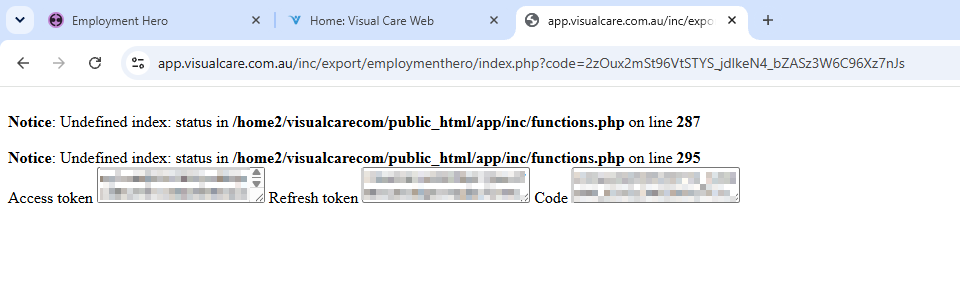
The Visualcare team enters these tokens to finalise the connection. Once complete, your Employment Hero data begins syncing to Visualcare daily at approximately 2am ACST.
Part 3: Match compliance items in Visualcare
For certificates to sync correctly, each Employment Hero certificate needs to be linked to a corresponding worker compliance item in Visualcare. Visualcare matches Employment Hero’s ID to the External Id field on the compliance item. This is a one-time setup you do yourself.- In Visualcare, go to Maintenance → Workers → Worker Compliance
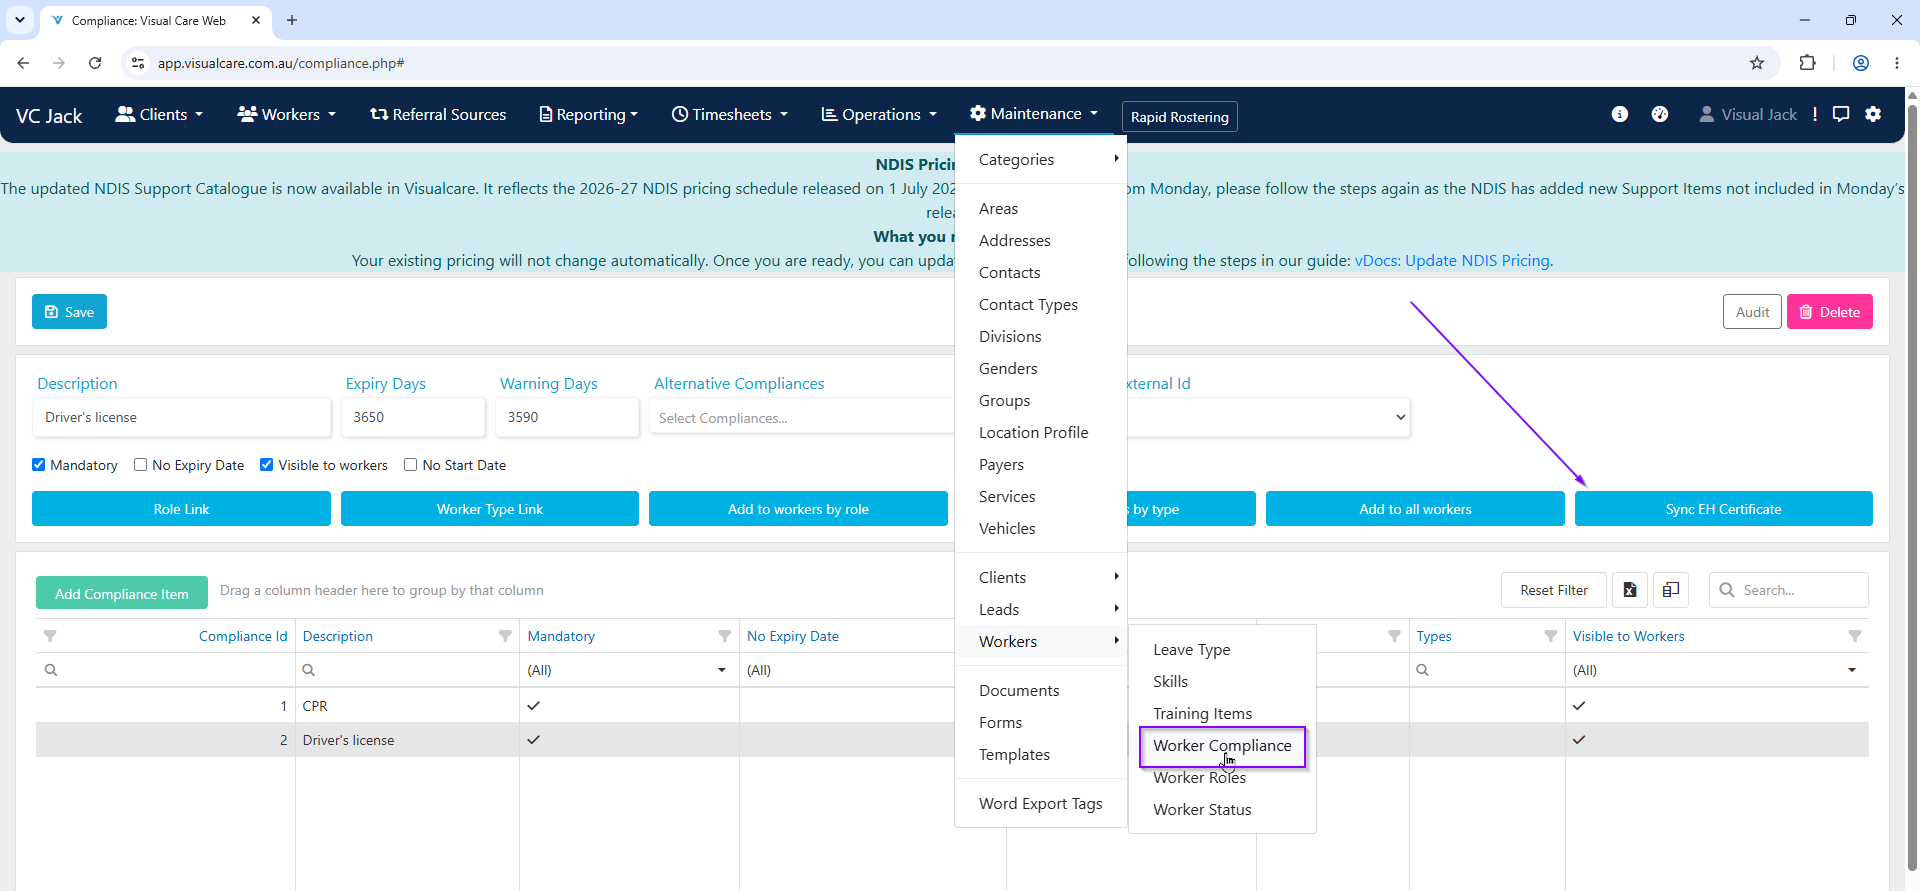
- Click Sync EH Certificate
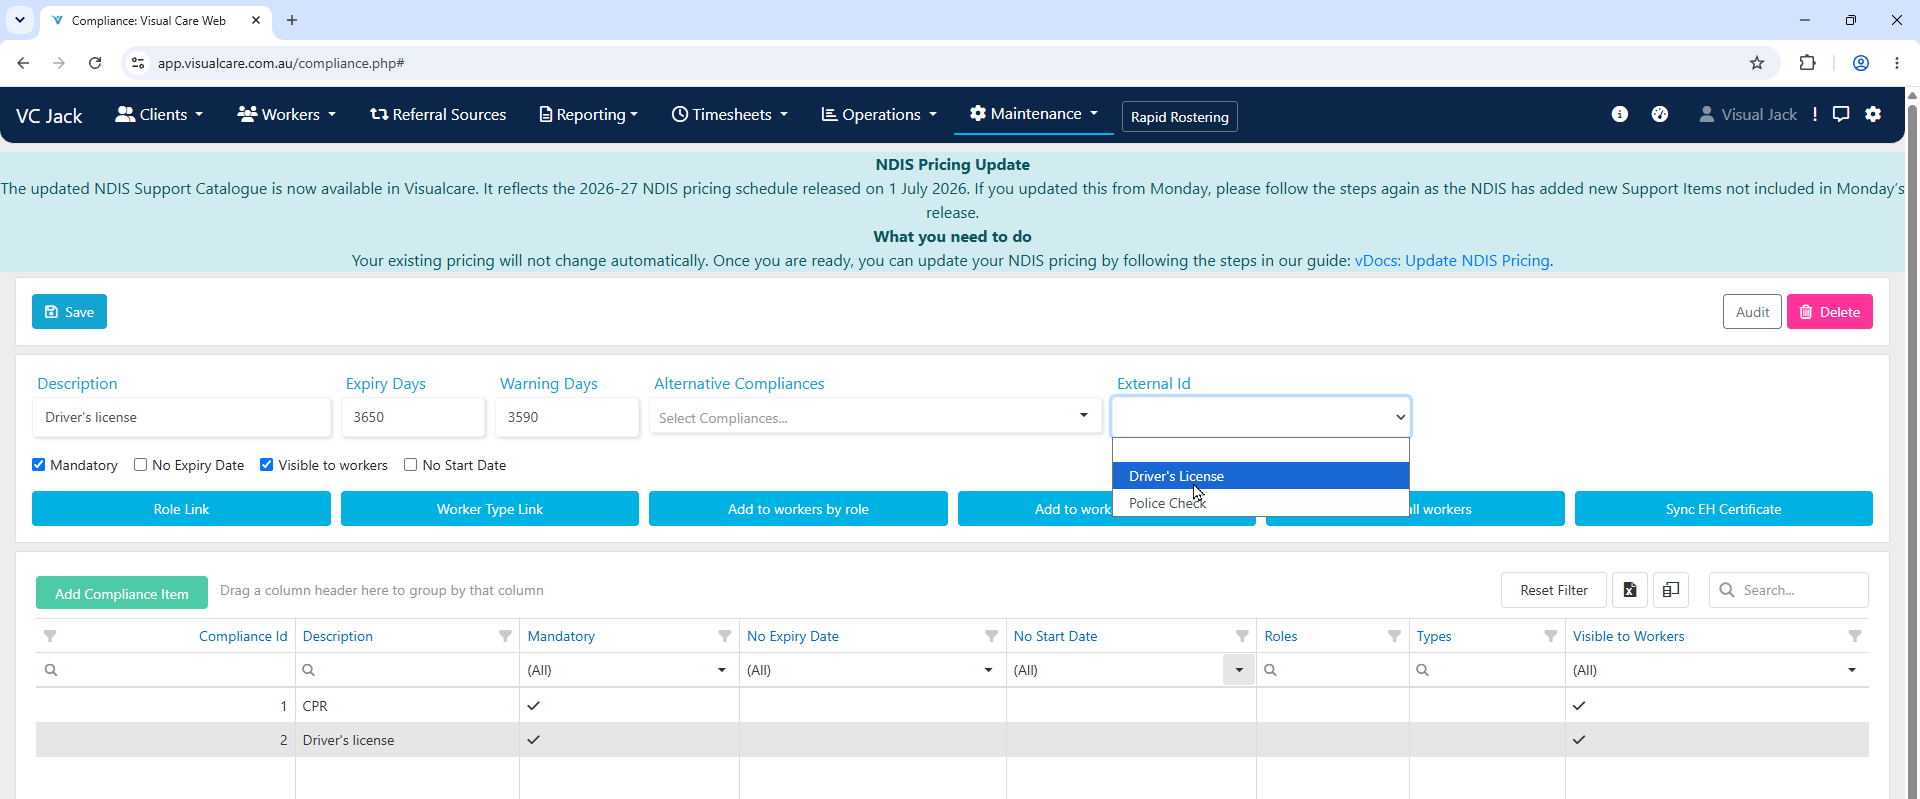
- Select a compliance item from the table at the bottom of the screen
- Select the matching External ID from the dropdown at the top of the screen
- Click Save
- Repeat steps 3 to 5 for each certificate you want to sync
api@visualcare.com.au is removed and replaced with the latest data from Employment Hero. Start dates and expiry dates are added to Visualcare if they are present in Employment Hero.
Running into issues?
See Integration troubleshooting for common errors and fixes.Related articles
Managing worker compliance
Set up and manage compliance items for workers
Xero integration
Connect Visualcare to Xero for invoice and payroll export
KeyPay integration
Connect Visualcare to KeyPay for payroll export