> ## Documentation Index
> Fetch the complete documentation index at: https://help.visualcare.com.au/llms.txt
> Use this file to discover all available pages before exploring further.
# Roster invitations
> How to send and manage roster invitations to workers for unallocated shifts
Roster invitations let you send shift offers to multiple workers at once. Workers receive a notification on the Vworker app and can accept or decline. Depending on your settings, shifts are either assigned automatically to the first responder or held for manual approval.
## Setting up roster invitations
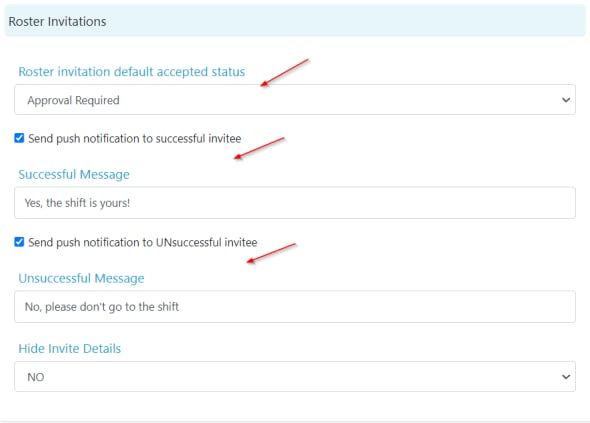
Before sending invitations, configure your settings under **Settings** → **Roster Invitation**.
 | Setting | Options |
| -------------------------------------------------- | ----------------------------------------------------------------------------------------------------------------------------------------------------------------- |
| **Roster invitation default accepted status** | **Approval Required** - shifts need manual assignment after acceptance. **Assign Directly** - the shift is automatically assigned to the first worker who accepts |
| **Send push notification to successful invitee** | Tick to send a notification and customise the message |
| **Send push notification to unsuccessful invitee** | Tick to send a notification and customise the message |
| Setting | Options |
| -------------------------------------------------- | ----------------------------------------------------------------------------------------------------------------------------------------------------------------- |
| **Roster invitation default accepted status** | **Approval Required** - shifts need manual assignment after acceptance. **Assign Directly** - the shift is automatically assigned to the first worker who accepts |
| **Send push notification to successful invitee** | Tick to send a notification and customise the message |
| **Send push notification to unsuccessful invitee** | Tick to send a notification and customise the message |
 ### Email notifications
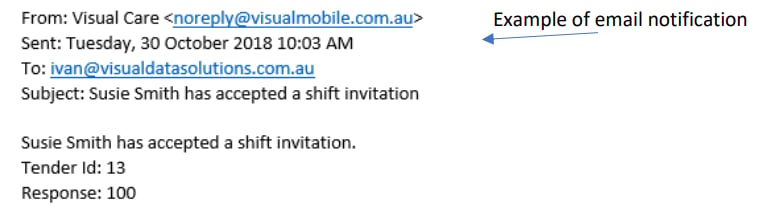
Set up the email address that receives notifications when shifts are accepted under **Settings** → **Company Information** → **General**.
### Email notifications
Set up the email address that receives notifications when shifts are accepted under **Settings** → **Company Information** → **General**.
 ## Creating an invitation
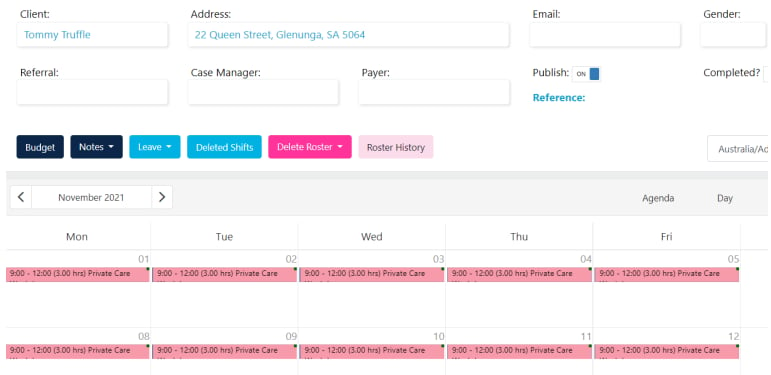
First, create a roster with no worker assigned. This allows the shift to flow through to the invitations area.
## Creating an invitation
First, create a roster with no worker assigned. This allows the shift to flow through to the invitations area.
 Go to **Operations** → **Roster Invitations** and click **Create New Invitation**.
 Click **Add Roster Item** and use the filters to find the shifts you want to include. Select the items and click **Add**.
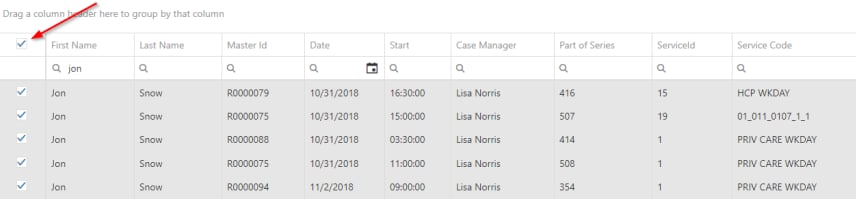 Only unallocated shifts appear in this list. Shifts you've already included in a previous invitation are excluded.
Click **Add Workers** and select workers from the list using the tick boxes. Scroll to the bottom and click **Add**.
Only unallocated shifts appear in this list. Shifts you've already included in a previous invitation are excluded.
Click **Add Workers** and select workers from the list using the tick boxes. Scroll to the bottom and click **Add**.
 Select the roster items you want to send and click **Send Invites**.
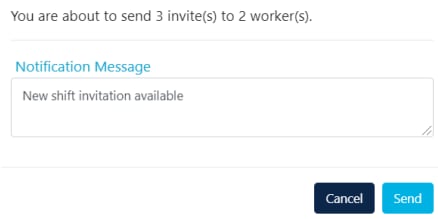
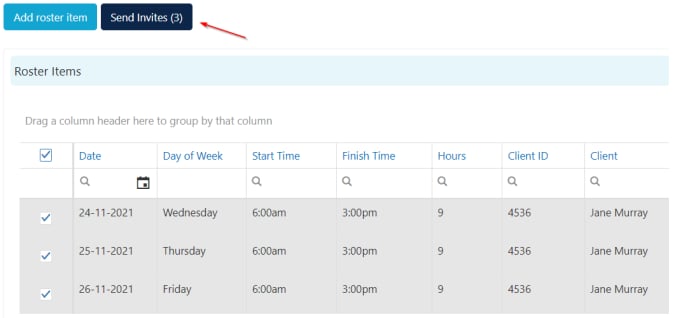 A window appears where you can customise the notification message. Workers receive a notification on their phone letting them know a new shift is available.
 ## Managing invitations
### Viewing responses
Go to **Operations** → **Roster Invitations** to view the list of invitations. You can filter by date and see high-level information including roster items included and number of workers invited.
## Managing invitations
### Viewing responses
Go to **Operations** → **Roster Invitations** to view the list of invitations. You can filter by date and see high-level information including roster items included and number of workers invited.
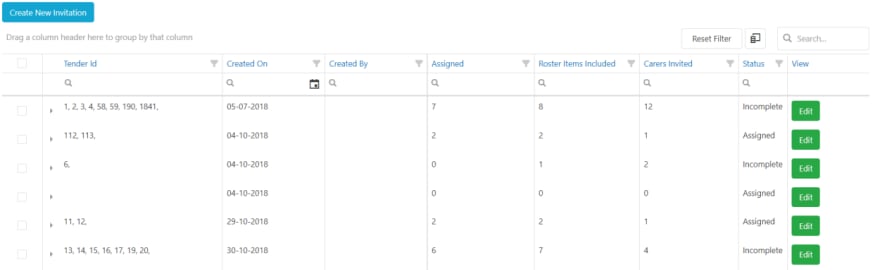 Click **Edit** to open an invitation. The top section shows roster items and who has responded. Click **View** to see individual responses.
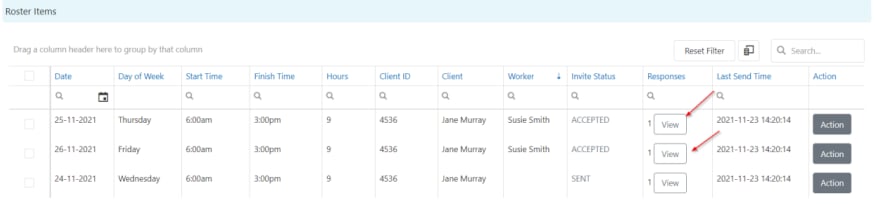 Use the column chooser to add or remove columns from the invitation view.
### Manually assigning a shift
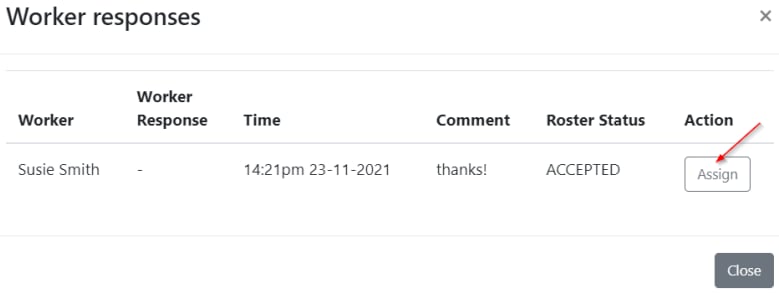
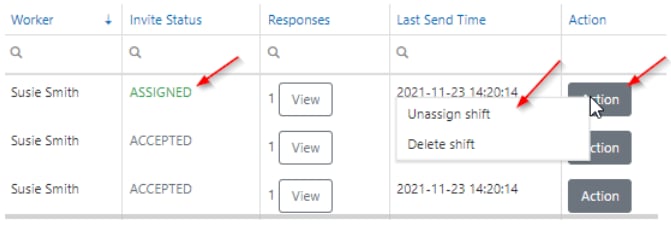
If your settings are set to **Approval Required**, click **Assign** to assign the shift to your preferred worker.
Use the column chooser to add or remove columns from the invitation view.
### Manually assigning a shift
If your settings are set to **Approval Required**, click **Assign** to assign the shift to your preferred worker.
 ### Unassigning or deleting a shift
If you need to remove a shift or reassign it, click the **Action** button and select your option.
### Unassigning or deleting a shift
If you need to remove a shift or reassign it, click the **Action** button and select your option.
 ## Worker experience on Vworker
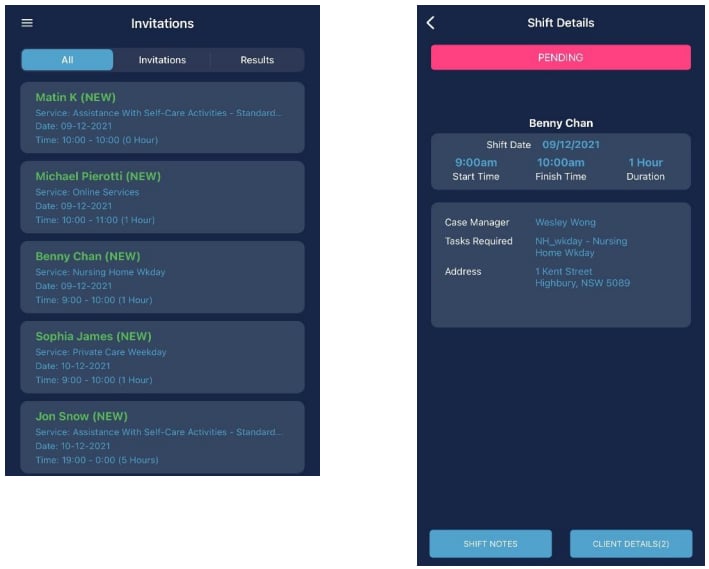
The invitation process from the worker's perspective:
1. The worker receives a notification that a shift invitation is available
2. They open **Invitations** in the Vworker app and view the shift details
3. They click **Accept** and can add comments about the shift
4. The invitation shows as **Pending** until assigned by office staff, then changes to **Accepted**
## Worker experience on Vworker
The invitation process from the worker's perspective:
1. The worker receives a notification that a shift invitation is available
2. They open **Invitations** in the Vworker app and view the shift details
3. They click **Accept** and can add comments about the shift
4. The invitation shows as **Pending** until assigned by office staff, then changes to **Accepted**
 ## Location roster invitations
You can send roster invitations for shifts within a location roster. To do this:
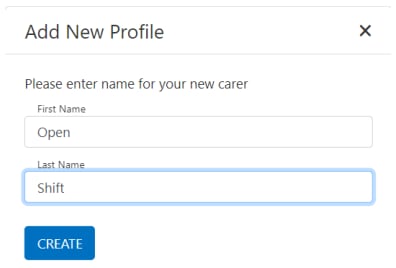
Create a worker profile as an "Unallocated" worker type. You might name this worker "Open Shift" or "Unallocated Worker".
## Location roster invitations
You can send roster invitations for shifts within a location roster. To do this:
Create a worker profile as an "Unallocated" worker type. You might name this worker "Open Shift" or "Unallocated Worker".
 Create a worker shift in the location roster and assign it to the unallocated worker. This allows the shift to flow through to the invitations area.
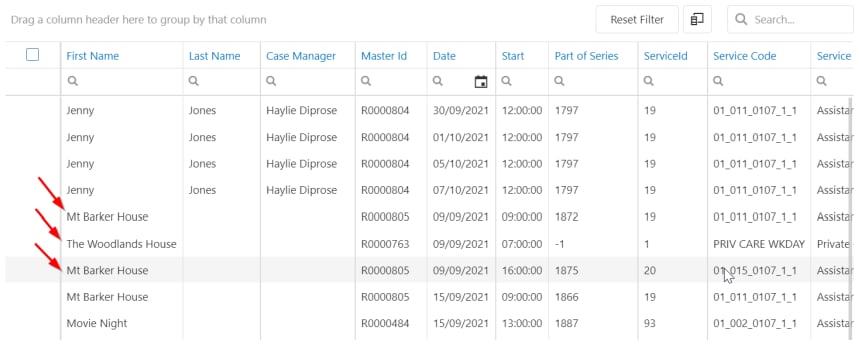 Click **Add New Invitation** and select **Add Roster Items**. The location shifts assigned to the unallocated worker appear in the list. Follow the same steps as above to send invitations.
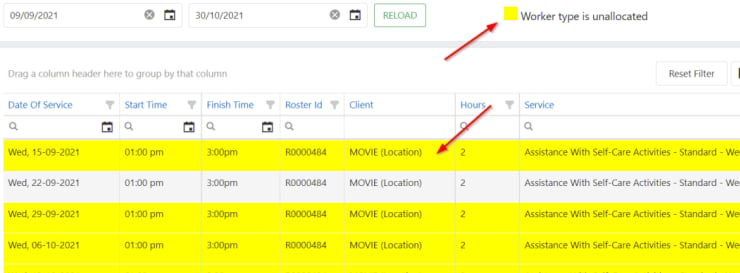
These shifts display the location name and appear in the unallocated KPI on the home page, highlighted in yellow.
Click **Add New Invitation** and select **Add Roster Items**. The location shifts assigned to the unallocated worker appear in the list. Follow the same steps as above to send invitations.
These shifts display the location name and appear in the unallocated KPI on the home page, highlighted in yellow.
 ## Running into issues?
See [Scheduling troubleshooting](/troubleshooting/rostering-issues) for common errors and fixes.
## Related articles
Find and manage shifts without assigned workers
Set up and manage location rosters
Filter and find the right worker for a shift
Configure invitation settings and other rostering options
## Running into issues?
See [Scheduling troubleshooting](/troubleshooting/rostering-issues) for common errors and fixes.
## Related articles
Find and manage shifts without assigned workers
Set up and manage location rosters
Filter and find the right worker for a shift
Configure invitation settings and other rostering options